Affichage des articles dont le libellé est photoshop. Afficher tous les articles

jeudi 22 octobre 2009

How to turn your photo into movie-like effect using Photoshop ?

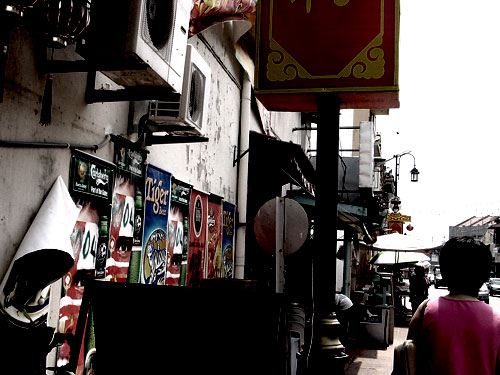
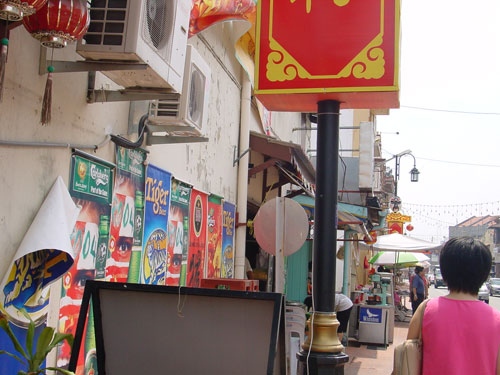
tut2-original.jpg
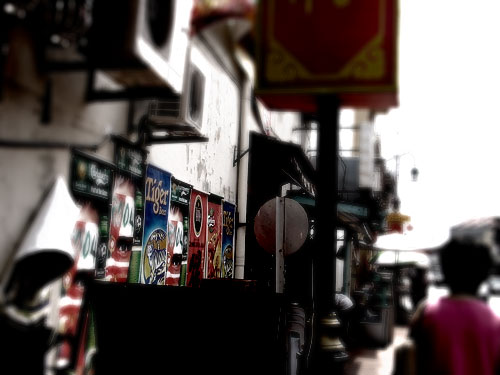
tut2-result.jpg
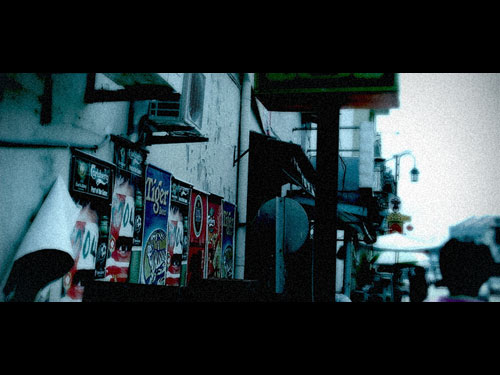
tut2-result2.jpg

What you need to have: Adobe Photoshop
What you will learn: colour mood adjustments + depth of field effect + film effect
PS: ⌘ key for Mac users / CTRL key for Windows users

Colour mood adjustments

1. Adjust the Hue/Saturation: U/CTRL-U
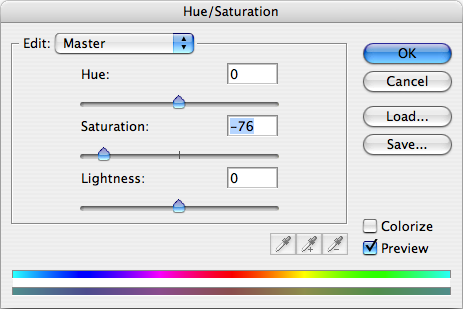
tut2-step1.png

tut2-step1-result.jpg

2. Adjust the brightness and contrast: Menu > Image > Adjustments > Exposure…
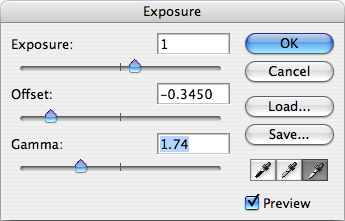
tut2-step2.png

tut2-step2-result.jpg

Depth of field effect

3. Duplicate current active layer by dragging it to the ‘create a new layer’ button located at the bottom of Layer window.

tut2-step3.png

tut2-step3b.png

4. Apply lens blur on the new layer on top: Menu > Filter > Blur > Lens Blur…
Adjust according to your own preference.
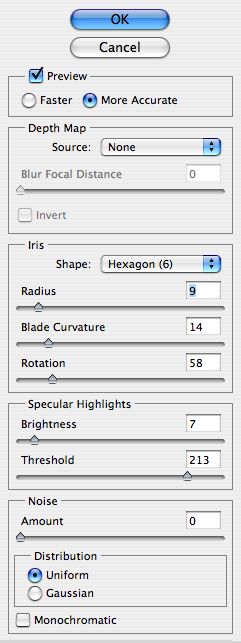
tut2-step4.png

tut2-step4-result.jpg

5. Click on the ‘add layer mask’ button at the bottom of Layer window. Then click and select the ‘Layer mask thumbnail’ (the white rectangle).
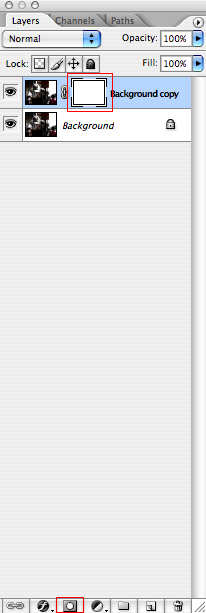
tut2-step5.png

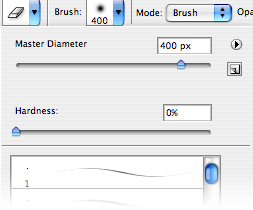
6. Select brush tool(b), set the master diameter to 400px. Then choose the focus point in the photo and click on it.

tut2-step6.png

tut2-step6b.png

tut2-step6-result.jpg

Film effect

7. Create a new layer by clicking the ‘create a new layer’ button located at the bottom of Layer window.

tut2-step7.png

8. Fill the new layer with black colour: reset colour to default black & white (d), switch black colour to background (x), fill the layer (⌘-del/CTRL-backspace)

9. Set the opacity of the black layer to 70% by pressing ‘7′

tut2-step9-result.jpg

10. Use erase tool(e), set the master diameter to 400px. Then start erase the center of the photo.
tut2-step10.png

tut2-step10-result.jpg

11. Flatten the image: Menu > Layer > Flatten Image and add noise: Menu > Filter > Noise > Add Noise…

tut2-step11.png

tut2-step11-result.jpg

Cinemascope (optional)

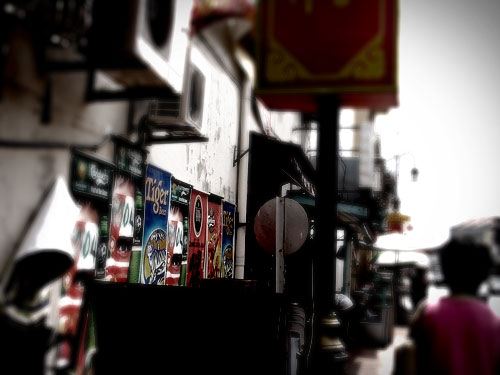
12. Add black bars on top and bottom of photo and it’s done!
Use Rectangular Marquee Tool(m) to select (drag) upper part of photo, hold the shift key and select the bottom part, fill with black colour (⌘-del/CTRL-backspace)

tut2-result.jpg

tut2-result2.jpg
You can also add an extra step to twist the colour into this mood by using ‘Color Balance’(⌘B/CTRL-B). Drag the slider towards cyan and blue for Shadows, Midtones & Highlights.

photoshop Skateboarding Poster

This tutorial will teach you some important techniques to help create high impact images. Follow the steps to create your own high impact Skateboarding poster.

Start working by creating a new file (File>New) of 1280×1024 px and 72 dpi.

Select then the Rectangle Tool (U) to represent the background of the picture we want to have in the end.


Set the next parameters by making a mouse click on the layer we work with on the layers’ palette. Fill 0%
Blending Options>Gradient Overlay

Create your own high impact Skateboarding poster in Photoshop CS3

Gradient’s parameters:

Create your own high impact Skateboarding poster in Photoshop CS3

Create your own high impact Skateboarding poster in Photoshop CS3

Next find a picture having a skateboarder on it. For this tutorial, I used this picture from Flickr. I would like to thank the author of this picture.

Create your own high impact Skateboarding poster in Photoshop CS3

Cut it out and insert it on our basic picture:

Create your own high impact Skateboarding poster in Photoshop CS3

Make 4 copies of the skateboarder’s layer, each of the layers being placed lower than the previous one. Place the copies on the picture, applying the Free Transform selection and incline them a little.

Create your own high impact Skateboarding poster in Photoshop CS3

Set the next indicated parameters for each of the following copies: Opacity 60%
Blending Options>Color Overlay

Create your own high impact Skateboarding poster in Photoshop CS3

Create your own high impact Skateboarding poster in Photoshop CS3

The second copy. The layer’s parameters: Opacity 50%, Blending Options>Color Overlay

Create your own high impact Skateboarding poster in Photoshop CS3

Create your own high impact Skateboarding poster in Photoshop CS3

The third copy. The layer’s parameters: Opacity 40%, Blending Options>Color Overlay

Create your own high impact Skateboarding poster in Photoshop CS3

Create your own high impact Skateboarding poster in Photoshop CS3

The fourth copy. The layer’s parameters: Opacity 30%, Blending Options>Color Overlay

Create your own high impact Skateboarding poster in Photoshop CS3

Create your own high impact Skateboarding poster in Photoshop CS3

Next we’ll represent several lines containing a kind of ornament. We’ll use this time the Pen Tool (P) and the Convert Point Tool for the appropriate corrections on these lines. All the lines’ layers should be situated lower than the layers containing the skateboarder:

Create your own high impact Skateboarding poster in Photoshop CS3

The layer’s parameters: Blending Options>Gradient Overlay

Create your own high impact Skateboarding poster in Photoshop CS3

Gradient’s parameters:

Create your own high impact Skateboarding poster in Photoshop CS3

Create your own high impact Skateboarding poster in Photoshop CS3

Create your own high impact Skateboarding poster in Photoshop CS3

The layer’s parameters: Fill 0% Blending Options>Gradient Overlay

Create your own high impact Skateboarding poster in Photoshop CS3

Gradient’s parameters:

Create your own high impact Skateboarding poster in Photoshop CS3

Create your own high impact Skateboarding poster in Photoshop CS3

Create your own high impact Skateboarding poster in Photoshop CS3

The layer’s parameters: Fill 0%, Blending Options>Gradient Overlay

Create your own high impact Skateboarding poster in Photoshop CS3

Gradient’s parameters:

Create your own high impact Skateboarding poster in Photoshop CS3

Create your own high impact Skateboarding poster in Photoshop CS3

Create your own high impact Skateboarding poster in Photoshop CS3

The layer’s parameters: Fill 0%, Blending Options>Gradient Overlay

Create your own high impact Skateboarding poster in Photoshop CS3

Gradient’s parameters:

Create your own high impact Skateboarding poster in Photoshop CS3

Create your own high impact Skateboarding poster in Photoshop CS3

Create your own high impact Skateboarding poster in Photoshop CS3

The layer’s parameters: Blending Options>Gradient Overlay

Create your own high impact Skateboarding poster in Photoshop CS3

Gradient’s parameters:

Create your own high impact Skateboarding poster in Photoshop CS3

Create your own high impact Skateboarding poster in Photoshop CS3

Create your own high impact Skateboarding poster in Photoshop CS3

The layer’s parameters: Fill 0%, Blending Options>Gradient Overlay

Create your own high impact Skateboarding poster in Photoshop CS3

Gradient’s parameters:

Create your own high impact Skateboarding poster in Photoshop CS3


Create your own high impact Skateboarding poster in Photoshop CS3

Create your own high impact Skateboarding poster in Photoshop CS3

The layer’s parameters: Fill 0%, Blending Options>Gradient Overlay

Create your own high impact Skateboarding poster in Photoshop CS3

Gradient’s parameters:

Create your own high impact Skateboarding poster in Photoshop CS3

Create your own high impact Skateboarding poster in Photoshop CS3

Create your own high impact Skateboarding poster in Photoshop CS3

The layer’s parameters: Fill 0%, Blending Options>Gradient Overlay

Create your own high impact Skateboarding poster in Photoshop CS3

Gradient’s parameters:

Create your own high impact Skateboarding poster in Photoshop CS3

Create your own high impact Skateboarding poster in Photoshop CS3

Create your own high impact Skateboarding poster in Photoshop CS3

The layer’s parameters: Fill 0%, Blending Options>Gradient Overlay

Create your own high impact Skateboarding poster in Photoshop CS3

Gradient’s parameters:

Create your own high impact Skateboarding poster in Photoshop CS3

Create your own high impact Skateboarding poster in Photoshop CS3

Next we’ll select the Line Tool (U) and represent a cross of black color. Firstly we’ll represent a vertical line and then press Shift button to represent a horizontal line, applying the same tool.

Create your own high impact Skateboarding poster in Photoshop CS3

Create your own high impact Skateboarding poster in Photoshop CS3

Make many copies of the layer containing the cross. Using the Free Transform option, try to change the copies’ sizes and place them the way demonstrated next picture:

Create your own high impact Skateboarding poster in Photoshop CS3
 

About

Site Info

Text

best tutorial for all Copyright © 2009 Community is Designed by Bie