Create this fun cutout effect that makes the subject look like it's coming in or out of a printed photo. In this Photoshop tutorial, you will learn how to use Photoshop's Extract tool, layer masks, and layer styles to create a cutout from a photo.
Preview of Final
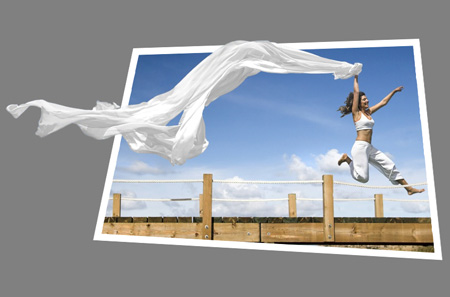
Photo Cutout Photoshop Tutorial
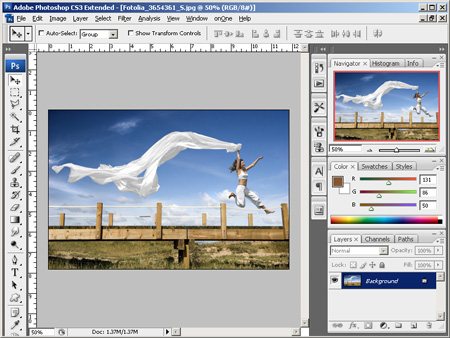
Step 1: Open a photo into Photoshop
To begin this tutorial, open a photo into Photoshop. To do this, open the File menu and select Open. Browse for and select a photo with a subject that you can use as a cutout then click OK.
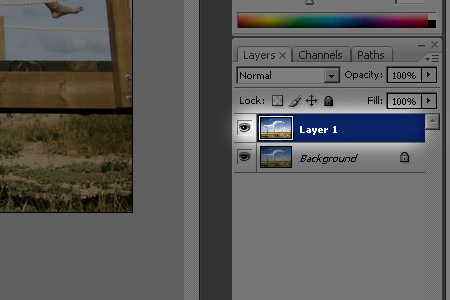
Step 2: Duplicate the layer
Press Ctrl+J to duplicate the layer.
Step 3: Open the Extract tool
To extract the subject, we'll be using Photoshop's Extract tool. Open the Filter menu and select Extract.
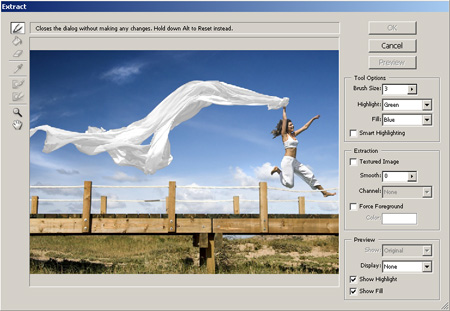
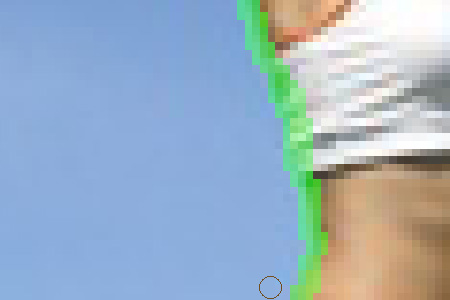
Step 4: Extract the subject
To extract the subject out of the photo, we highlight the edge around the subject with a brush. Before we begin, select a brush size that is just thick enough to cover the edge. Then, checkmark "Smart Highlighting". Now press Ctrl++ to zoom in until you can see the pixels clearly. Paint over the edge of the subject. When you reach the edge of the screen, hold the spacebar, click, and drag to move to a different part of the photo. When highlighting the edge, let go of the mouse button every few seconds. This way, when you make a mistake, you can simply press Ctrl+Z to undo that small portion. Although extracting can be quite boring, if stay slow and steady, you can avoid mistakes and complete this step faster.
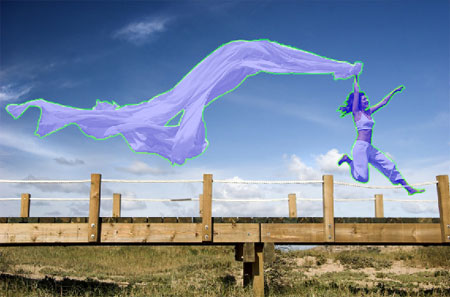
Step 5: Fill the area
Once you're done creating an outline of the edge, select the fill tool and fill the subject. Your subject should now have a blue fill with a green outline. Click OK.
Step 6: Unlock the background layer
We need to add a layer mask to the background layer. But before we do this, we need to unlock it. Double-click on the Background layer. A window should appear where we can specify the layer options. Click OK and you should now have a layer called "Layer 0".

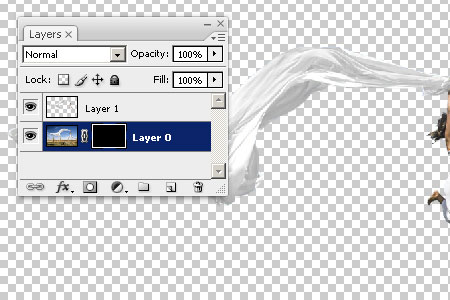
Step 7: Add a layer mask
Now we'll add a layer mask to the layer. Open the Layer> New Layer Mask menu and select Hide All. This will create a black layer mask and will make the layer invisible.
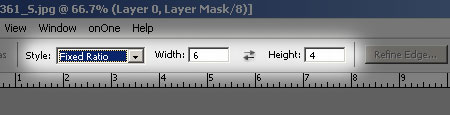
Step 8: Select the Rectangular Marquee tool
From the toolbar, select the Rectangular Marquee tool. It should be the second one listed in the toolbar. Once you select it, the option bar near the top of the Photoshop window should have a drop down menu where you can select the style. Select Fixed Ratio as the style and enter 6 as the width and 4 as the height. This will ensure that the selection you create will be of the same aspect ratio as a printed 4x6 photo.
Step 9: Create a selection and fill
First, make sure that the layer mask is selected. Now create a rectangular selection and fill the selection with white. Don't worry if you can't get the selection where you want it to be; we will fix this later.
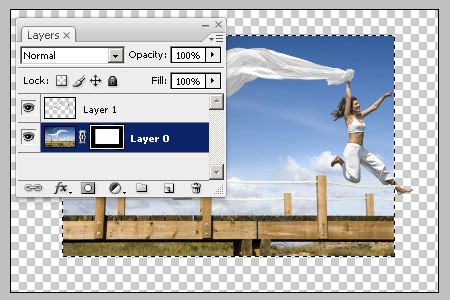
Step 10: Unlink the layer mask
Between the layer and its layer mask, there is a link icon. Click on that icon and it should disappear indicating that the layer mask is unlinked from the layer. With the layer mask unlinked, we can move the contents of the layer mask without causing the layer to move.

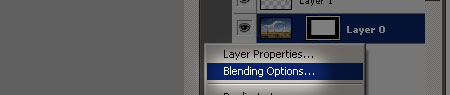
Step 11: Access the blending options
Right-mouse click on the layer and select "Blending Options".
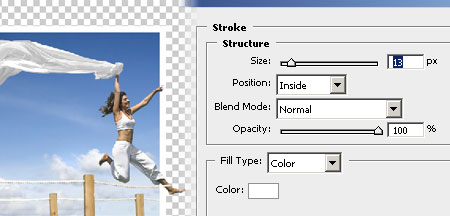
Step 12: Fill the area
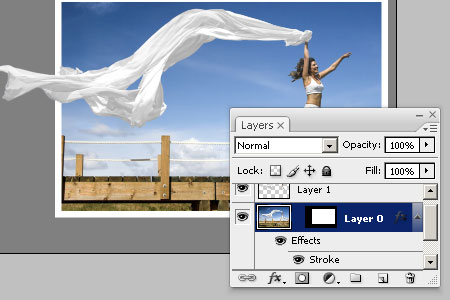
In the Blending Options window, checkmark and select "Stroke". You should now have a set of options for the stroke. First, set the position to inside and color to white. Then, adjust the size to create a white border around the photo. Click OK when done.
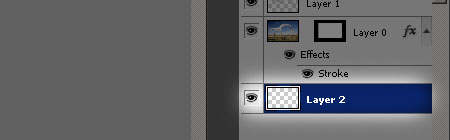
Step 13: Create a new layer
Click on the "Create a New Layer" button in the Layers pallet. Drag the new layer to the bottom of the stack.
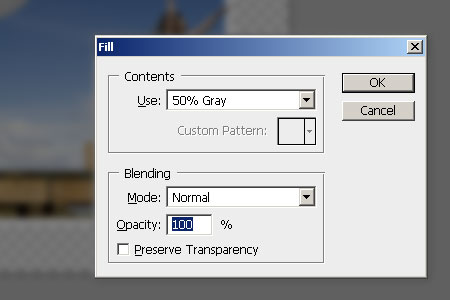
Step 14: Fill the layer
Press Ctrl+Backspace to access the Fill tool. With this tool, you can fill the layer with any color you like. I'm going to select the 50% Gray for this step. Click OK when you have your color selected.
Step 15: Fill the area
Finally, we're at the last step where we can reposition the photo. Select the layer mask then select the move tool from the toolbar. Drag the frame around to position it in a creative position where part of the subject is outside of the photo.
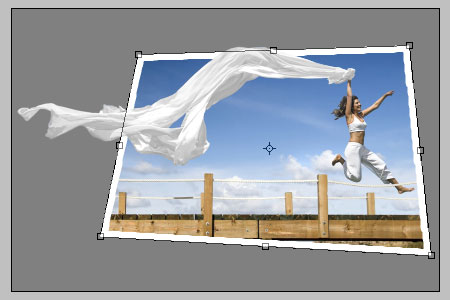
Step 16: Distort the picture (Optional)
To add a more three dimensional effect, you may distort the image. To do this, press Ctrl+T to activate the Transform tool. Now hold the Ctrl key and drag each of the four corner to skew their position.
Final Results
Original Photo
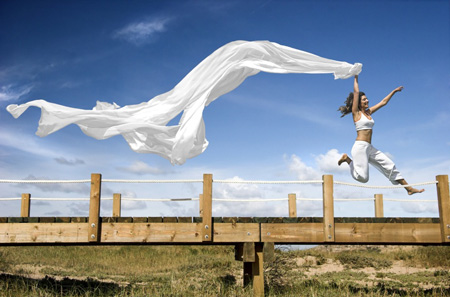
Photo Cutout Photoshop Tutorial


0 commentaires:
Enregistrer un commentaire