In this tutorial, I am going to explain how to make eyeballs (eyes),
and how to set up their materials.
 Outline
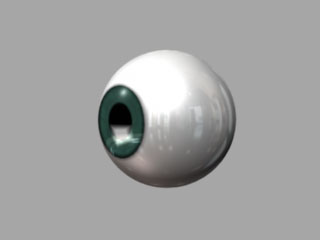
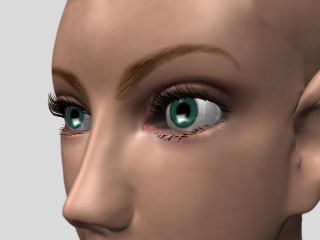
The above figure is rendering only of an eyeball.
Rendering was executed with MayaSoftware with Raytracing on.
It is necessary to note the contrast to show the eyeball vividly.
I made a strong contrast in a bright part of the reflection of the cornea
and a black part of the pupil.
I think it is not necessary to make complete anatomy model.
But I think that you should reproduce the structure of the reality to some degree.
reference page of anatomy structure of eyeball
I explain a simple method in this chapter,
and I explain an advanced method that has of generality in the following chapter.
modeling an eyeball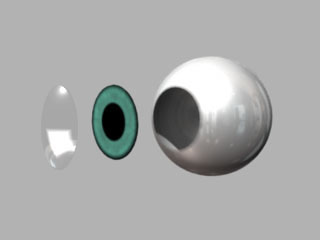
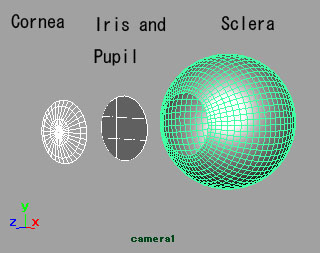
I did modeling separately for three parts of
a cornea, an iris and pupil, a sclera (the white of the eye)
I made the cornea and the sclera with the polygon sphere,
and I made the iris and pupil with NURBS.
building the material of the cornea
The above is a rendering image only of the cornea.
It is a completely transparent material.
It has the highlight of Specular and two reflections of Reflected Color.
I named the reflections Reflection1 and Reflection2.
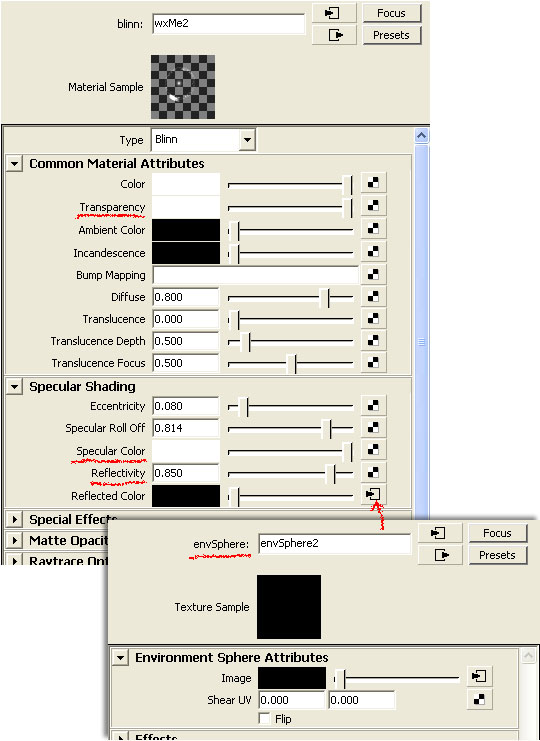
Assign a Blinn material to the cornea.
Set maximum value to the Transparency .
Set high value to the Specular and Reflectivity
Connect a Env Sphere of Environment Texture to the Reflected Color,
and connect a Ramp Texture (the below) to the Env Sphere.
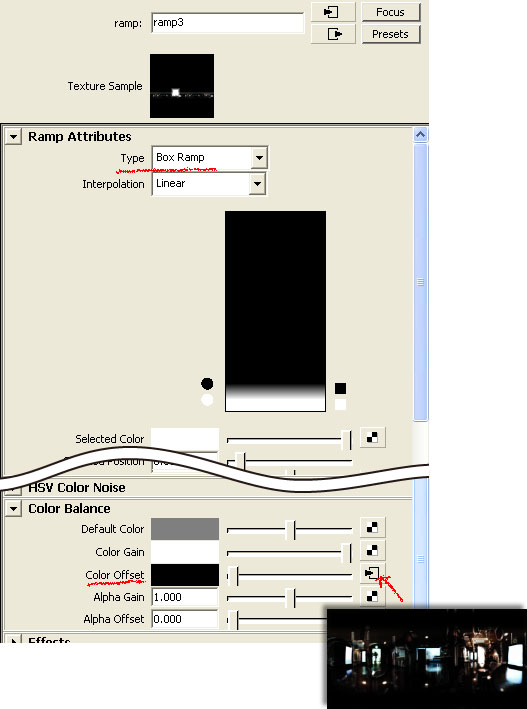
A Ramp Texture was connected to the Env Sphere.
This is the Reflection1.
Select Box Ramp of the Ramp Texture, it will be square shape.
Adjust the place of the Reflection1 with the place2DTexture.
Connect a File Texture to the Color Offset of the Ramp Texture.
Set a photograph image of reflection to the File Texture.
This is the Reflection2.
Adjust the place of the Reflection2 with the place2DTexture.
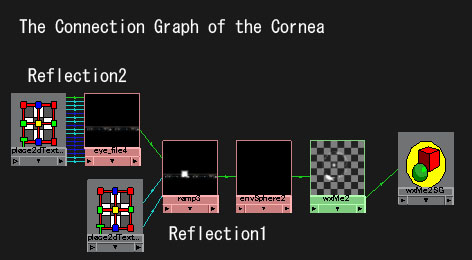
The Connection Graph of the material of the cornea is shown
in the above figure.
You can make the Reflection1 and the Reflection2 as one picture file
with Photoshop.
In this example, it was divided into two like this.
It is because you can easily adjust the position of
the reflections individually with the place2DTextures.
building the material of the iris and pupil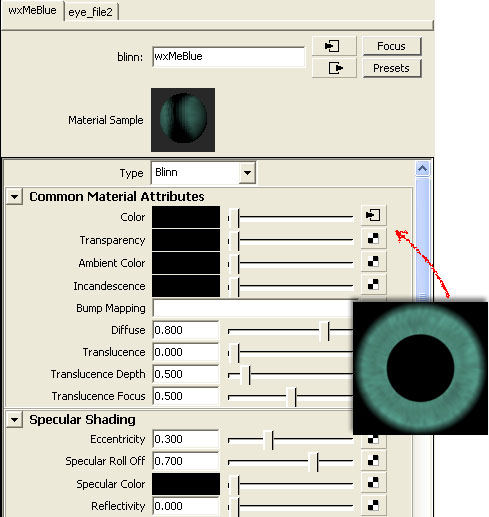
Assign a Blinn (or Rambert) material to the iris and pupil.
Set 0 to the Specular, it will have no highlight.
Connect a File Texture to the Color.
Set a image of an iris and pupil like the above to the File Texture.
building the material of the sclera (the white of the eye)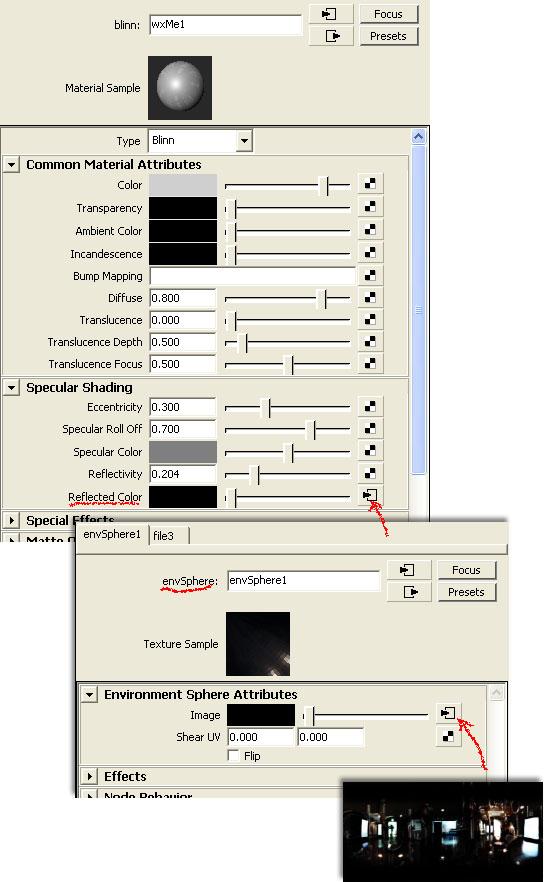
Assign a Blinn material to the sclera.
Connect a Env Sphere of Environment Texture to the Reflected Color.
Set a photograph image of reflection to the File Texture.
Finished.
It continues to the explanation of a method that has of generality.
It is a method of changing the size of the iris and pupil easily.

0 commentaires:
Enregistrer un commentaire