
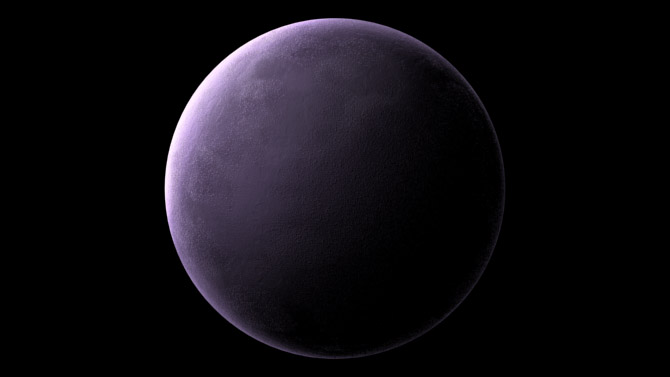
Picture 1. The final result of the 3D planet render tutorial.
This tutorial covers the creation of a 3D planet render in 3DS MAX. The texturing of the 3D planet is done with procedural maps only, so no bitmaps are needed. The 3D planet creation process consists of the the following steps:
- Texturing a sphere with Diffuse, Bump, and Self-Illumination maps
- Illuminating the planet with Omni lights
- Creating rings by texturing a tube with an opacity map
In picture 1 you see the final 3D planet render. Click on the image to see a larger version at the bottom of this page.
3D Planet Geometry
Let's start by creating the planet geometry. Create a sphere (Create > Standard Primitives > Sphere) with the following settings:
- Radius: 40
- Segments: 100 (Use the Modify panel to change the parameters of the selected object
 )
)
You don't necessarily need 100 segments. It depends on what distance you look at the planet. If you need to avoid heavy geometry you might use less segments. The good thing is that you can always change this parameter later.

Picture 2. A simple Sphere object is the geometry for 3D planet render.
Planet Material
The material creation is probably the most important and complicated part of this tutorial. The goal is to create a material that has both large and small details.
Apply a Standard Material to the Planet
Let's apply standard material to the planet:
- Select the Sphere
- Open Material Editor (Rendering > Material Editor...)

- Apply standard material to the selected object (Sphere)

Super Sampling
The planet material is going to utilize bump maps so we should turn SuperSampling on. Simply put, Supersampling is an antialiasing technique that increases the rendering quality. (As a rule of thumb you should turn SuperSampling on at least always when you utilize bump maps, reflection maps, or bitmaps as diffuse maps.) To turn Supersampling on:
- Expand the SuperSampling rollout
- Turn off: Use Global Settings
- Turn on: Enable Local SuperSampler
- Select Adaptive Halton from the drop-down list
- Increase Quality value to 1,0
(These are settings for high quality supersampling which is very time consuming. If your rendering slows down too much I recommend changing the local supersampler from Adaptive Halton to Max 2.5 Star. Max 2.5 Star is not the best but it's very fast. You could for example use that for now and use Adaptive Halton for the final render.)
Bump Map
Bump maps are a very big part of this material. We are going to create bump details by combining several different procedural maps with the help of a Composite map. There are two reasons why we use several procedural maps (instead of just one):
- By combining several procedural maps we can create both large and small scale details
- Single procedural map isn't random enough to produce believable results
In picture 3 you see the whole bump map design of this material. You can just copy the settings or read along and take one step at a time to understand the reasoning behind these settings.

Picture 3. The bump map design for the 3D planet material.
Large Scale Details with Splat
First we use a procedural map called Splat to create large craters:
- Expand the Maps rollout
- Add Composite Map as a bump map
- Change the Opacity of the Layer 1 to 20 (this decreases the strength of the bump map effect)
- Add Splat to the first slot of Layer 1 and make the following adjustments to it:
- Size: 10
- Iterations: 4
- Threshold: 0,3
- Color #1: Black
- Color #2: White
(The composite map itself doesn't have any effect. It's just a container that is able to hold several maps. Inside a composite map, each map behaves as a separate layer. The layers work pretty much like in Photoshop, for example they have opacity settings and they can have masks.)
Render a test image to see the effect of the Splat bump map. The rendering should look like in picture 4.

Picture 4. The effect of Splat as bump map.
Small Scale Details with Splat
Let's add small scale details to the surface. We can do this easily by adding sub-maps to the Splat map:
- Add Noise map to the black color component of the Splat. Make the following adjustments to the Noise map:
- Noise Type: Turbulence
- Levels: 10
- Size: 0,8
- Add Speckle map to the white color component of the Splat. Make the following adjustments to the Speckle map:
- Size: 3
Now let's make a 3D planet render again to see how the surface looks like. Now the craters are less visible and covered with small scale details (picture 5).

Picture 5. Very small details created with Noise and Speckle maps.
Another Layer of Small Scale Details
Let's enhance the effect by adding another layer of small scale details:
- Create a new layer to the Composite map

- Change the Opacity of the new layer to 40.
- Add Speckle map to first slot of the Layer 2 and make the following adjustments to it:
- Size: 2
Render a test image to see the effect (picture 6). Now there are even more small details. Craters are less visible and look more real.

Picture 6. 3D planet render after adding the Speckle bump map.
Third Layer Produces Small Mountains to Some Areas
The purpose of this final layer is to add small mountains to random areas of the surface. Mountains are created with a Noise map and randomness is achieved with Dent map mask.
- Create a third layer to the Composite map
- Add a Noise map to the first slot of Layer 3 and make the following adjustments to it:
- Noise Type: Turbulence
- Levels: 10
- Size: 0,35
- Color #1: White
- Color #2: Black
- Add a Dent map to the second slot (mask) of layer 3 and make the following adjustments to it:
- Size: 700
- Strength: 80
- Iterations: 10
Now the bump effect is ready. Make a test render to see how it looks like. The rendering should look like picture 7.

Picture 7. Planet render with the final bump map. There are large craters, tiny mountains, and other small details.
Diffuse Map
Diffuse color is made with two procedural maps inside of a Composite map. In the image below (picture 8) you see the whole diffuse map design. You can just copy the settings or read along to understand the reasoning behind these settings.

Picture 8. Diffuse map design for the 3D planet render.
Color Variations with Dent
Let's use Dent map to add some color with random intensity variations:
- Expand the Maps rollout
- Add Composite Map as a diffuse map
- Add Dent to the first slot of Layer 1 and make the following adjustments to it:
- Size: 700
- Strength: 20
- Iterations: 10
- Color #1: 144,121,171 (RGB)
- Color #2: 123,103,146 (RGB)
Now the rendered planet should look like in picture 9. Now there are some color variations but the overall coloring is still too monotonous.

Picture 9. First part of the diffuse map design is Dent.
Perlin Marble
Let's add some chaos to the coloring by using Masked Perlin Marble. (We use Mask because we want Perlin Marble to appear only in some parts of the surface.)
- Create a new layer to the Composite map
- Add a Perlin Marble map the first slot of Layer 2 and make the following adjustments to it:
- Size: 50
- Levels: 10
- Color #1: 176,164,190 (RGB)
- Color #2: 79,70,89 (RGB)
- Add a Smoke map to the second slot (mask) of layer 2 and make the following adjustments to it:
- Size: 40
- Iterations: 20
Render the 3D planet to see the result. The image should look similar to picture 10.

Picture 10. 3D planet render with the final diffuse map.
Self-Illumination Map
Next we are going to add some self-illumination to the edges of the planet. Think of it as an atmosphere that picks up reflected light.

Picture 11. Gradient Ramp parameters.
- In the Maps rollout, set the Amount of Self-Illumination to 40.
- Add Gradient Ramp as self-illumination map and make the following adjustments to it:
- Click on the the gradient bar to add a new flag to it. Now there are total of 4 flags. Make the following adjustments to them (picture 11):
- R=255,G=255,B=255, Pos=0
- R=255,G=255,B=255, Pos=8
- R=0,G=0,B=0, Pos=16
- R=0,G=0,B=0, Pos=100
- Gradient Type: Normal
- Interpolation: Custom
- Click on the the gradient bar to add a new flag to it. Now there are total of 4 flags. Make the following adjustments to them (picture 11):
Now there is small rim of light in the edges of the planet (picture 12).

Picture 12. Rim of light is created with a Self-Illumination map.
Illuminating the 3D Planet
The illumination is carried out by using three back lights and one fill light (Here you can read more about back, fill, and key lights). First we illuminate the planet from the top left side:
- Create an Omni light to the top left side of the planet (Create > Lights > Standard Lights> Omni)
- Increase the Multiplier of the Omni light to 3.
- Move the Omni light until the illumination looks like in picture 13.

Picture 13. Planet render with a single Omni light.
Next we are going to create two additional Omni lights to illuminate the planet from the top and left sides:
- Create second Omni light to the top side of the planet and third Omni light to the left side of the planet.
- Increase the Multiplier of the second and third Omni light to 2.
- Move the lights until the illumination looks like in picture 14.
Now the illumination is more interesting.

Picture 14. Planet render with three Omni lights.
Reveal Details with Fill Light
Next we create a fill light to see more details in the planet surface:
- Create a fourth Omni light to the top left side of the planet
- Decrease the Multiplier of the Omni light to 0,8.
Move the fourth Omni light until the illumination matches picture 15.
Picture 15. 3D planet render with four Omni lights.
Atmosphere for the 3D Planet
There are many ways (materials, lens effects) to create an atmosphere for a planet but I think the best and easiest to control is to do it with Volume Fog Environment Effect.
Create a gizmo for the fog effect (gizmo is just a container that will hold the fog):
- Create Sphere Gizmo (Create > Helpers > Atmospherics > Sphere Gizmo)
- Use modify panel to change the Radius of the sphere gizmo to 43.
- Use Align tool to place the gizmo exactly to the center of the planet. (you can also use snap or just place it manually approximately to the center of the planet.)
The gizmo should look like in picture 16. It's just a little larger than the planet.

Picture 16. Sphere gizmo around the 3D planet.
Volume Fog Environment Effect
Let's add the fog effect to the sphere gizmo:
- Open environment settings (Rendering > Environment...)
- In Atmosphere rollout, click Add... button, select Volume Fog from the list and click OK.
- In Volume Fog Parameters rollout, click Pick Gizmo button and then click the sphere gizmo to select it. Now the volume fog effect is applied to the sphere gizmo. Make the following adjustments in the Volume Fog Parameters rollout:
- Color: 198,185,214 (RGB)
- Density: 15
- Noise Type: Turbulence
- Uniformity: 1
- Size: 5
Render an image to see the result. The image should look like in picture 17. Now the planet is ready. As you probably see there are endless possibilities to create different materials by using composite maps to combine several procedural maps.
If you want to add rings to the planet, read on.

Picture 17. The final 3D planet render.
Rings for the 3D Planet
Planet rings are pretty simple to create:
- Create a Tube and make the following adjustments to it:
- Radius 1: 43
- Radius 2: 105
- Height: 0
- Height Segments: 1
- Cap Segments: 1
- Sides: 100
- Use Align tool to place the tube to the center of the planet.
- Rotate the tube if you want to
Apply a Standard Material to the Planet Rings
- Select the Tube
- Open Material Editor (Rendering > Material Editor...)
- Select a default material and apply it to the selected object (Tube)
- Make the following adjustments in the Blinn Basic Parameters rollout:
- Diffuse: 207,164,254 (RGB)
- Self-Illumination: 100
- Opacity: 0
- Open Maps rollout, set the Amount of Opacity to 80 and add Gradient Ramp as Opacity map
- Make the following adjustments to the Gradient Ramp map:

Picture 18. Gradient Ramp parameters.
- In Coordinates rollout:
- Mapping:Planar from Object XYZ
- In Gradient Ramp rollout, add 18 flags to the gradient bar (picture 18). Now there are total of 20 flags. Make the following adjustments to them (or you could just be creative and create something similar):
- R=0,G=0,B=0, Pos=0
- R=0,G=0,B=0, Pos=48
- R=32,G=32,B=32, Pos=50
- R=0,G=0,B=0, Pos=52
- R=72,G=72,B=72, Pos=54
- R=0,G=0,B=0, Pos=56
- R=139,G=139,B=139, Pos=61
- R=0,G=0,B=0, Pos=66
- R=99,G=99,B=99, Pos=67
- R=0,G=0,B=0, Pos=68
- R=62,G=62,B=62, Pos=72
- R=0,G=0,B=0, Pos=76
- R=0,G=0,B=0, Pos=78
- R=23,G=23,B=23, Pos=79
- R=0,G=0,B=0, Pos=80
- R=52,G=52,B=52, Pos=82
- R=14,G=14,B=14, Pos=84
- R=27,G=27,B=27, Pos=87
- R=0,G=0,B=0, Pos=90
- R=0,G=0,B=0, Pos=100
- Gradient Type: Radial
- Interpolation: Custom
- In Coordinates rollout:
The Final 3D Planet Render
In picture 19 you see the final planet render. If you learned how to master composite maps you should be able to create multitude of different materials that work well as 3D planet surfaces.

Picture 19. The final 3D planet render.

0 commentaires:
Enregistrer un commentaire