Tutorial Details
- Program - Photoshop CS3
- Difficulty level - intermediate
- Time to complete - 1 hour

Video Tutorial
Our video editor Gavin Steele has created this video tutorial to compliment this text + image tutorial.
Step 1
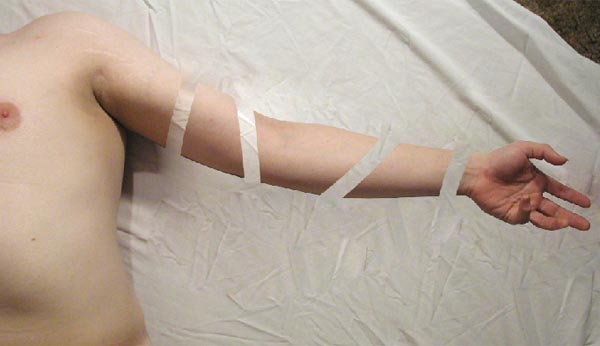
We will be using two different stock items for this project - first, the arm from cobweb-stock (use "Arm08.jpg" from the zip file) and a lump of meat from stock xchng. Please remember to follow these artists rules and credit them where appropriate.
We start by opening the arm picture in Photoshop and duplicating the "Background" Layer by clicking Command + J. We want to preserve the background layer for later on. Hold the Alt key + double-click the duplicate layer, then rename it "Arm."
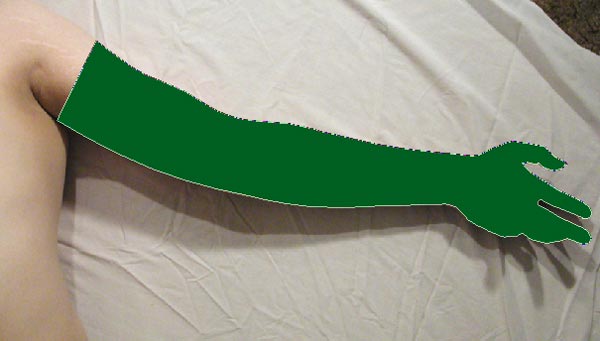
Choose the Pen Tool (set to Shape Layer) to cut out the arm from its background. Its important to have a clean cut, so first zoom into the picture using the Magnifying Glass and carefully trace around the edge cutting across the top of the arm, as in the picture below. If you set the Fill in the Layer Palette to a 0% you will be able to see the arm, but still manipulate the path.
Step 2
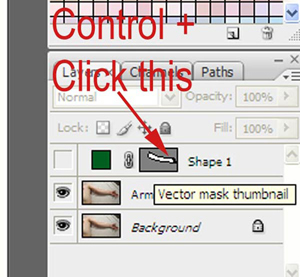
Once you have completed your path and you are happy with it, click the Eye Icon in the Layer Palette next to the Shape Layer to hide it. Follow this by holding Command + Clicking the Shape Layer. This puts a Selection around the "Arm" Layer, now press Command + J on the keyboard to create a copy of the arm onto a new Layer, rename this Layer "Arm Prime" and hide it by clicking the Eye Icon.
Step 3
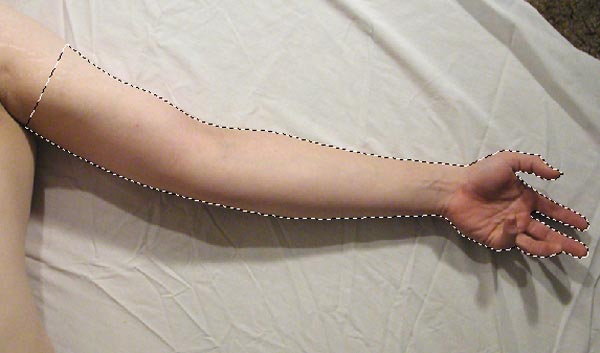
We are now going to remove the arm and shadow from the "Arm" Layer. Choose the Heal Tool from the Toolbox with mode set to normal in the options bar. Sample some of the sheet around the arm by Holding Alt + Clicking the sheet. Luckily the sheet is quite creased so making it look convincing will be easy.
Start painting over the arm and resample different parts of the sheet to keep the texture from repeating. Activate "Arm Prime" from time to time to make sure you don't go to far up the arm. Eventually the arm and shadow will be removed leaving you with a stump and a clean sheet as in the picture below.
Step 4
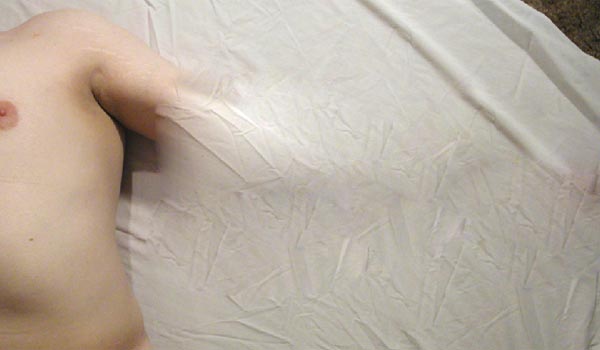
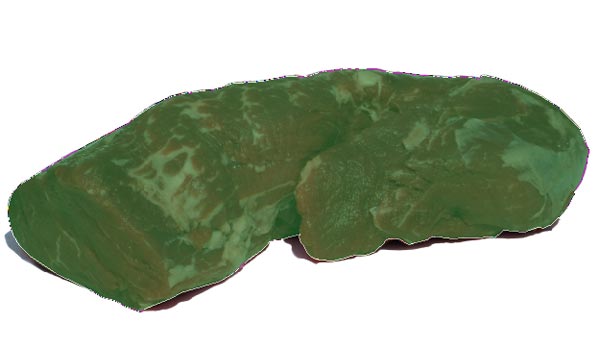
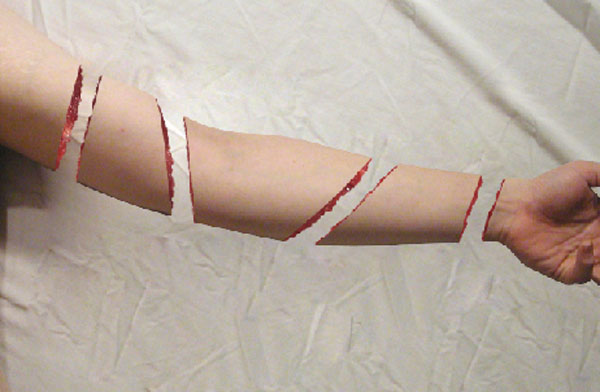
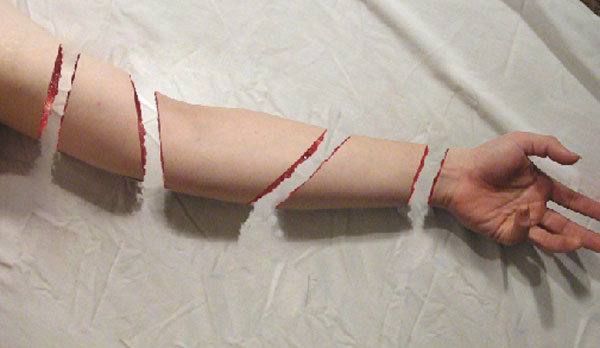
Reactivate the "Arm Prime" layer by pressing the Eye Icon next to it in the Layer Palette. Next we want to add a Layer Mask (Layer > Layer Mask > Reveal All) to this Layer so we can mask out some of the arm. Choose a Hard Edged brush from the Brush Picker setting the size to 80 pixels, Opacity of 100% and Flow of 100%. Next set your Foreground color to black (#000000) and on the Layer Mask draw four cutting lines as in the picture below.
Step 5
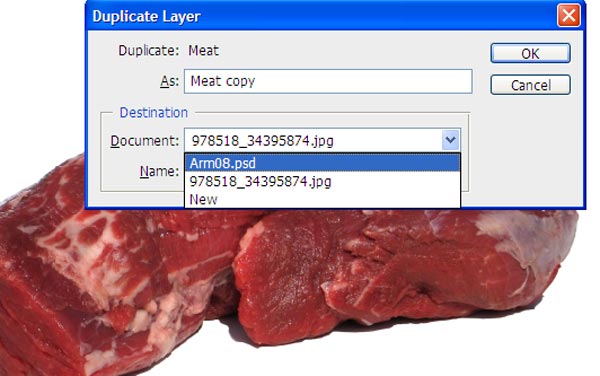
Save your progress and open the meat texture file that we downloaded earlier. Once again cut it out from its background. You don't need to be as careful with this as we want to rough it up a bit soon anyway. Use your Pen Tool as before to trace around the edge - be careful not to select the shadow.
As in Step 2 copy this to a new Layer by pressing Command + J, and rename this layer "Meat." We now want to copy it to the working document, we do this by holding the Alt key and dragging the "Meat" layer to the "Create a New Layer" Icon within the Layer Palette . This will open a dialog asking you what document you want to copy it too. Choose "Arm08" (which is our working document) from the list, and Click OK. Finally, go back to the "Arm08" document.
Step 6
Move the "Meat" layer to the top of the Layer Stack. Use the Healing Brush to remove some of the larger white patches of fat on top of the meat with other sampled texture. If you don't have the Healing Brush then feel free to use the Clone Stamp. Position the Meat Layer so it totally covers the arm and hand, move the Meat Layer below the "Arm Prime" Layer.
Step 7
We are now going to draw the flesh back onto the arm stumps, we begin by adding a Hide All Layer Mask to the "Meat Layer" (Layer > Layer Mask > Hide All). Next we want to choose a Soft Edge Brush from the Brush Picker with a size of around 10-20 pixels, Opacity 100% and Flow 100%, the settings then need to be adjusted.
Press F5 or go to Window > Brushes to open the Brush dialog window. If you are using a pressure sensitive tablet then, your first stop is the Shape Dynamics, under Size Jitter locate the Command Drop Down List and select Pen Pressure.
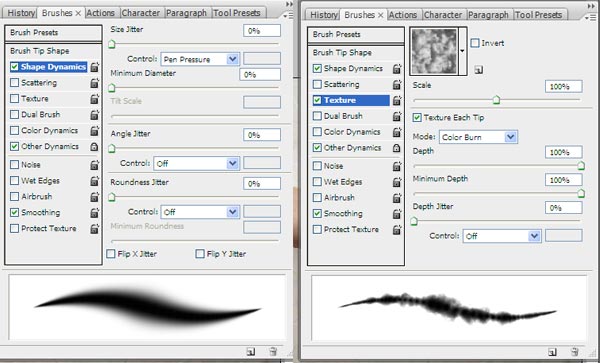
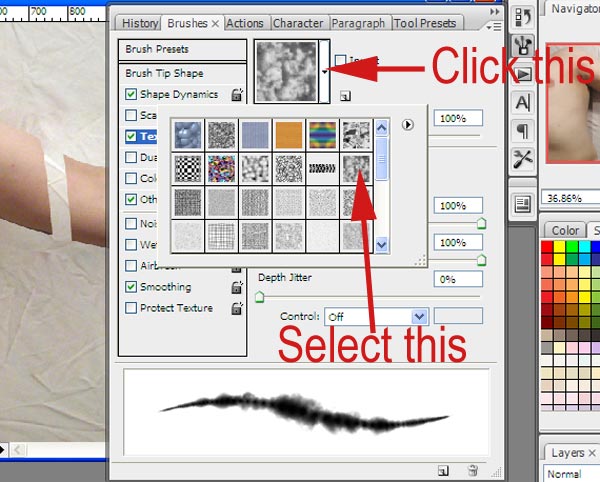
We then want to change the Texture of the Brush to give it a nice rough look, choose Clouds from the provided list of textures, with Scale 100% also tick Texture Each Tip.
Step 8
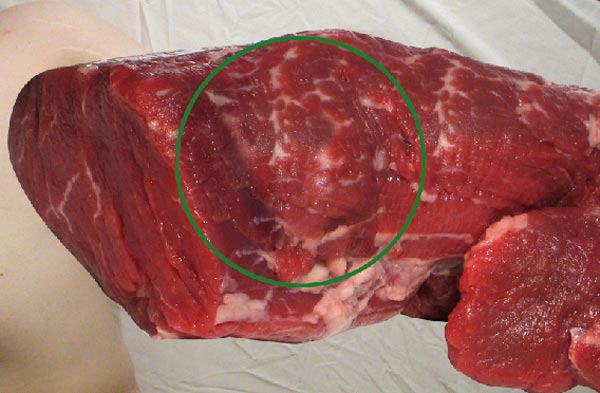
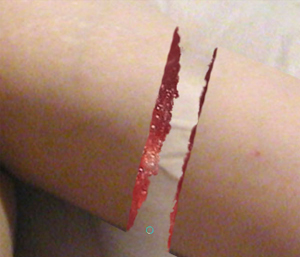
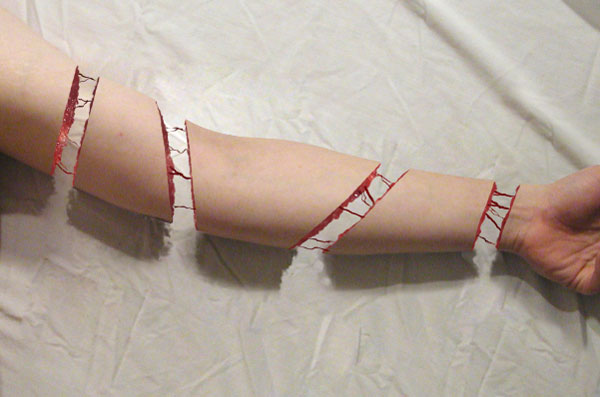
We are now ready to paint the meat back on, Select the Meat Layer's Mask and with the Brush's Foreground Color set to White (#FFFFFF) gradually build up the arm as in the picture below. Repeat this for each section of arm.
Step 9
The shadow of the arm is used to ground the image and make it look less fake. We use the shadow from the original photo we preserved as the background layer. Locate the "Arm" Layer and Add as Reveal all Layer Mask (Layer > Layer Mask > Reveal all).
We will now mask out some of the "Arm" layer revealing the shadow below, try and follow the shape of the arm. Once again we will be using a Soft edge brush, or you can continue to use the textured brush we created in the last step if you wish. This will add a rough edge to your shadow especially around the stumps.
Step 10
The project is almost complete. The final steps are to draw some veins and strings of flesh onto the stumps and make some shadows. We shall reuse the "Meat" layer for this step.
First we need to copy this layer, either press Command + J or drag it to the new Layer Icon within the Layer Palette. The new layer will be called "Meat Copy." Drag this above the "Arm Prime" layer and delete its Layer Mask by right-clicking on the Mask and selecting Delete Layer Mask. Once again the whole slab of meat should be visible.
The meat needs to be a little darker for the strings - so we adjust it with Levels (Image > Adjustments > Levels) setting the Input Levels to 0, 0.64, and 255. We are then going to add another Hide All Layer Mask to this Layer (Layer > Layer Mask > Hide All>).
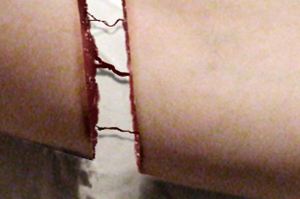
Choose the Brush Tool again, the textured brush should still be active. If not, then set it again as in Step 7, adjust the size so it is very small around 4 or 5 pixels. On the Layer Mask draw some strings of flesh joining the stumps together. Draw it from flesh to flesh - not skin to flesh.
Step 11
The strings of flesh will cast shadows down onto the cloth beneath, we can easily fake this by choosing the "Meat Copy" layer Mask and holding Command while Clicking it. This will put a selection around the strings.
Next we make a new Layer called "Shadow" and fill the selection with black (Edit > Fill > Black). Using the Move Tool adjust the shadow slightly so it is away from the strings. The black will be too dark so we reduce the Opacity to around 50%. You can also add a 2 pixel Gaussian Blur if you feel it is still too sharp. Finally, drag it below the "Meat" layer.

Step 12
Choose the Burn Tool from the Toolbox and set the Range to Midtones. Next set the Exposure to 20% and click the Airbrush option. Select the "Meat" layer and add some dark edges where the meat is exposed. Select "Arm Prime" and change the range to shadows, then burn the flesh where the arm has been severed.
Conclusion
The final and probably the easiest step is to create a Black And White Adjustment Layer at the top of the layer stack and change the Blending Mode to Soft Light. This makes the picture darker and more washed out. If you don't have the Black and White Adjustment Layer option, then create a Hue/Saturation Adjustment Layer and reduce the Saturation to -100.
Have fun cutting up your own meaty images. The final image is below.

0 commentaires:
Enregistrer un commentaire